

How to Write a creative brief for personal projects

Having a brief for your personal projects is the most important piece of the puzzle. Without a brief the execution of the project will be all over the place, you will get overwhelmed with endless possibilities, and it will take you longer to execute; if you don’t give up in the process.
Creating personal work is exciting but it can be daunting. Many artists struggle to create personal work because it’s a land of endless opportunity. Too many possible roads to take. In my previous blog, I wrote about how to come up with ideas for personal projects. And one of the burning questions I got is how to write the brief for them once the idea is picked. In this blog, I will walk you through my process of writing a brief for my personal projects.
Why do I need to have a brief?
I have a number of personal projects under my belt, but I didn't always start one with a brief. I didn’t think I needed one because I looked at my personal projects as fun, devil-may-care projects, to practice and build my portfolio. But after putting so much time and effort into them, I also wanted to showcase them in my portfolio. However, once I tried to build a case study, and present them in a professional manner, I could see the gaps in the art direction and execution style. They were more like standalone pieces, rather than a well-thought-out personal projects. To cover up my oversight, I would redo some parts of the project in order to make them look more coherent and professionally presented. This was not fun. I realized that if I had started the project with a clear brief, I wouldn't have had to spend time redoing it. So now I start all my personal projects, even standalone ones, with a brief.
Following these steps, you will learn how to write a brief for your personal projects, that will look professional in your portfolio.
STEP ONE: Name your project
Project naming is fun but also a very important first step. Having a proper name for your project will impact the outcome because it is the first thing people will see and remember. It is basically branding your project. In my experience, the name needs to speak clearly about the project. Yes, sometimes it is cool to have some fun with it and use puns or a witty name. Names like that draw attention for sure. However, even in such cases, the name should state clearly what the project is about. Depending on the type of personal project, and its goal, you should have a different approach when naming your project. For example, if you are working on a series that has one underlined subject, make sure you include that subject in the name. You can add a frequency to the name, like daily, weekly etc, to let people know right away when the new content will come out. If your project is targeting a specific audience, consider using words that will directly call to that audience. Here are a few really well-named personal projects to give you an idea.
Honest Valentine by Olga Musician; set of Valentine’s Day cards with honest messages.
Tiny Blades Project by Annyen Lam; series of tiny hand-cut paper illustrations.
Ovary Actions by Annie Wong; series of menstruation-themed animated GIFs
GeekyPet by Alana McCarthy; paintings of pets as pop-culture icons
Creative Incantations by me; series of Halloween spell cards for creative witches and wizards.
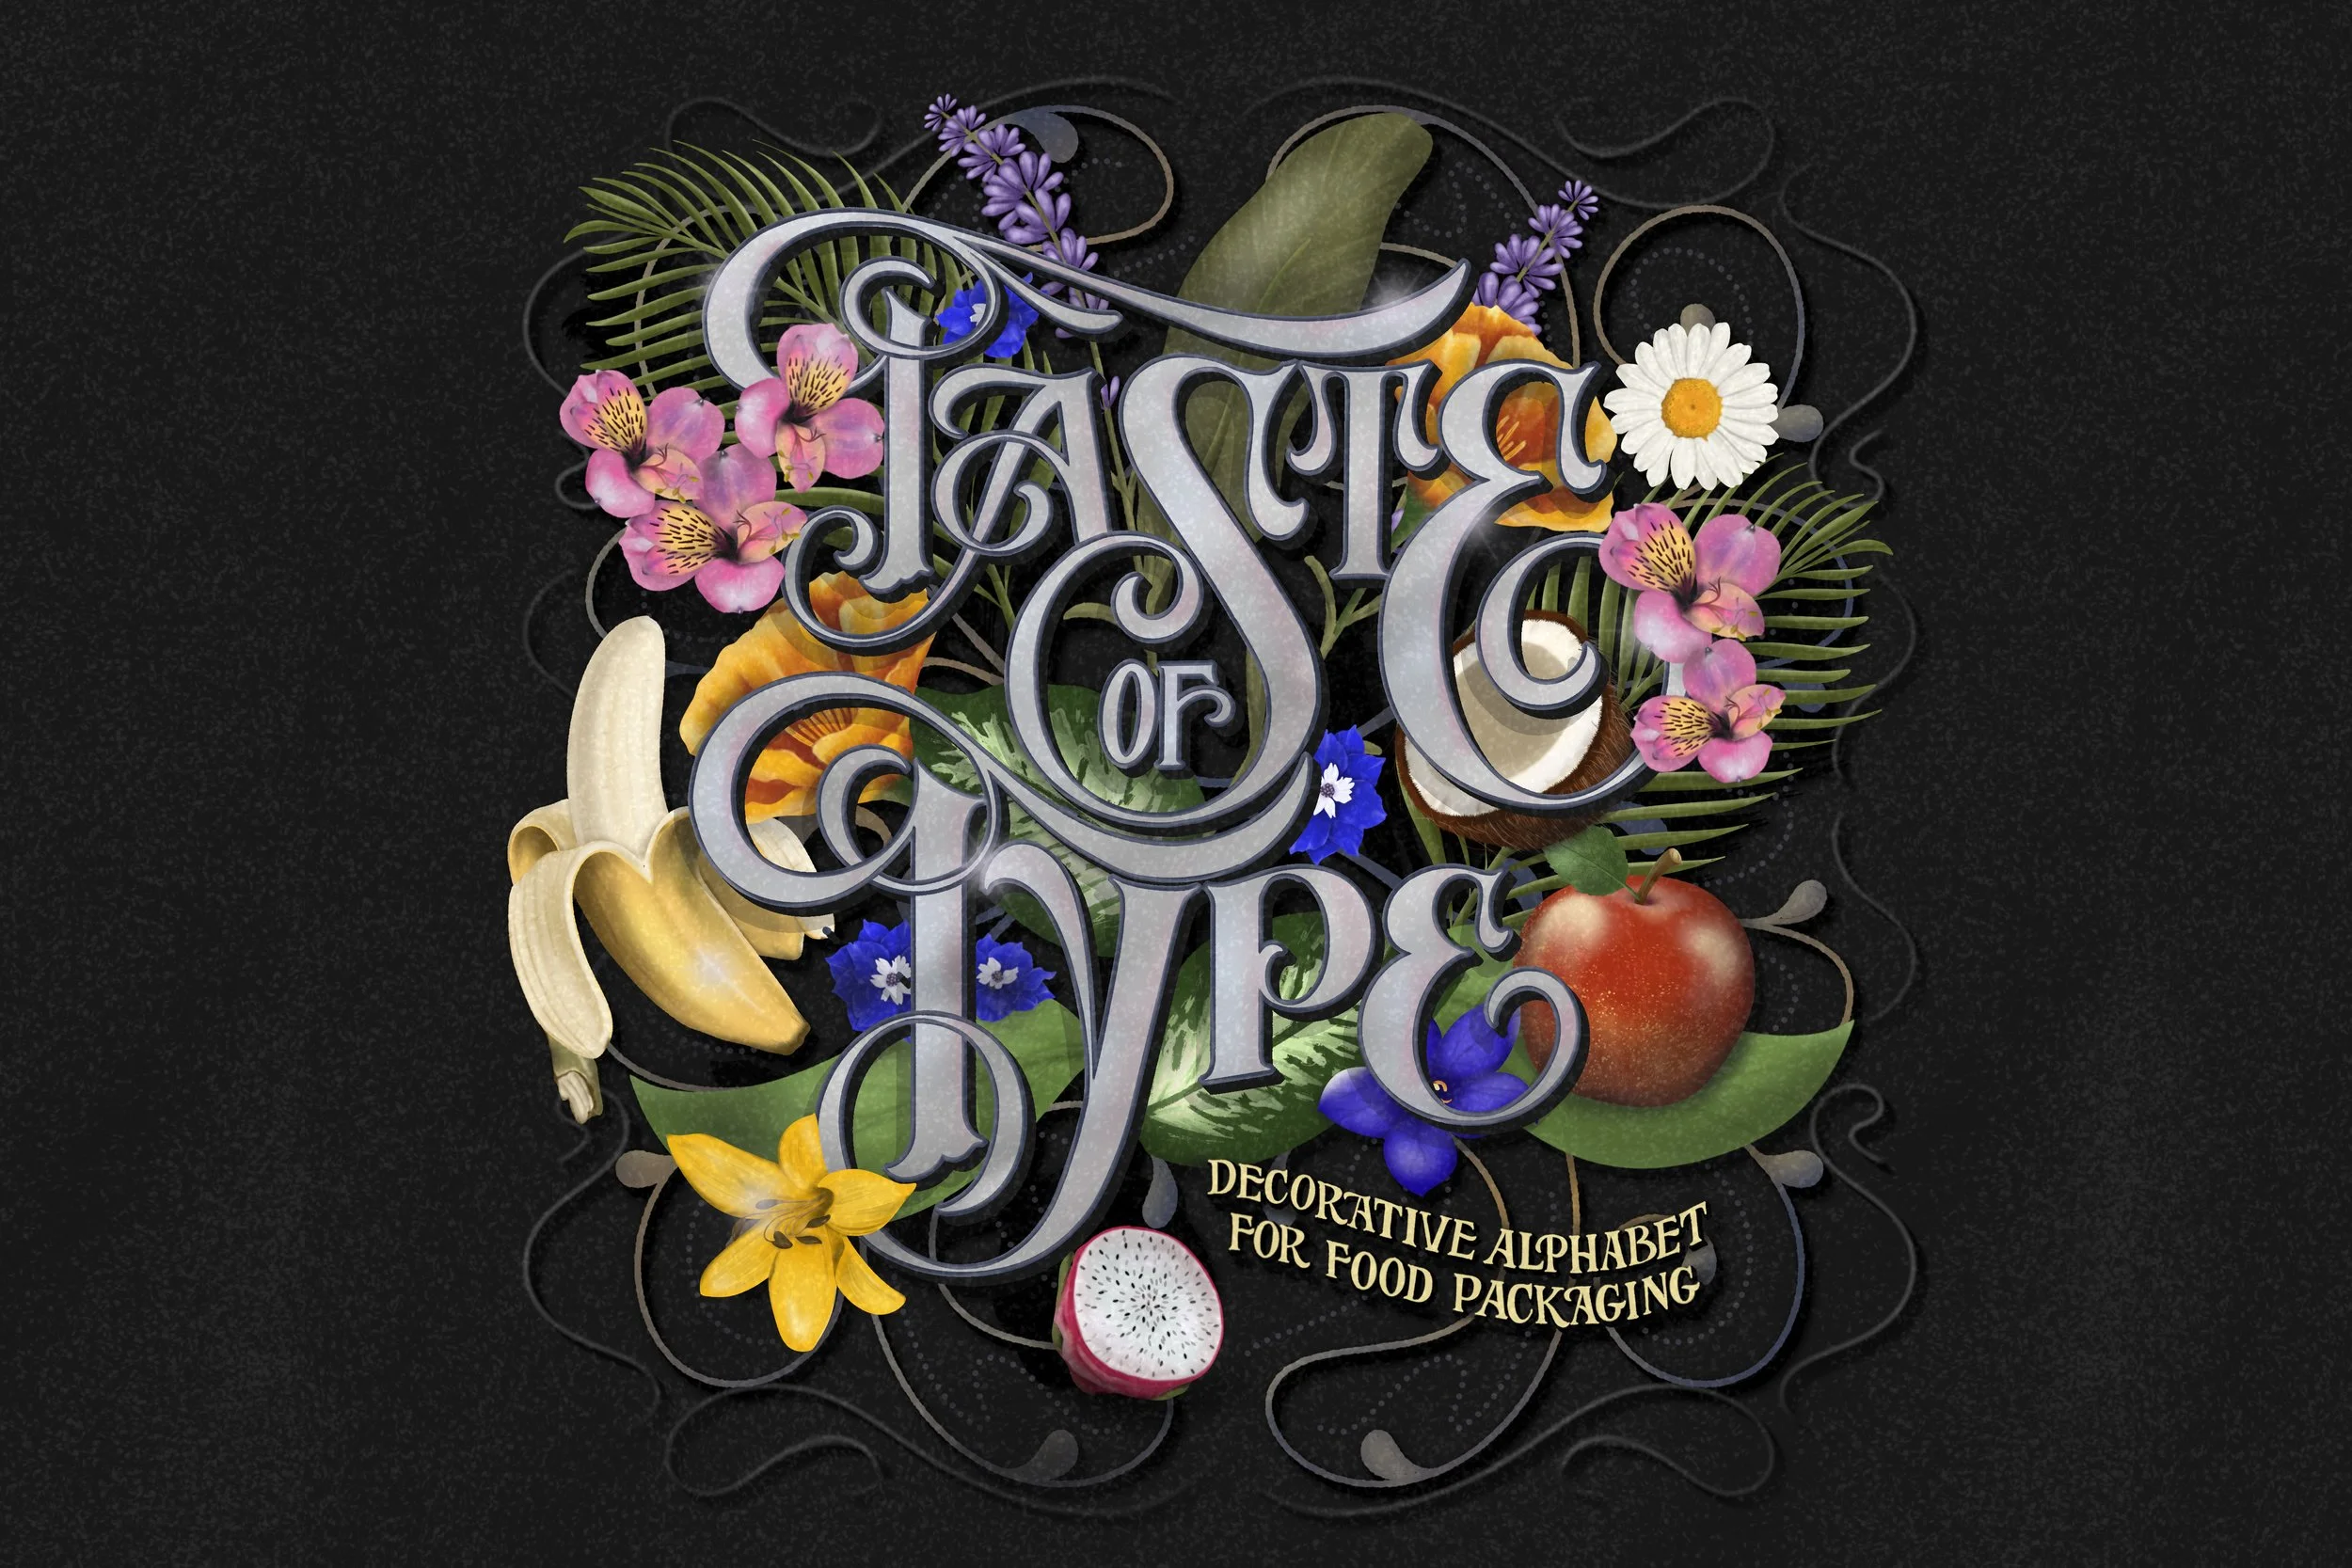
How I named this 36 Days of Type project. I edited the sayings Taste of Home, Taste of Italy etc., to name my project. The project features a decorative alphabet for food packaging, and this play on words fits perfectly. It is short, catchy and describes the project well.
STEP TWO: Determine duration and frequency
Timeline is an extremely important parameter in your brief because it will help you with your mindset. It will also help you with scheduling the project in your calendar and making time for it. The frequency will determine how often you will have to work on your project, and the deadline will push you to focus on allocating the time for the project for a specific period. But, be realistic when setting these parameters. The last thing you want is to realize that you don't have the capacity for it. But also know that life happens, work happens, and if needed you can adjust these parameters to fit your schedule. It's better than giving up. I've done this many times with my projects, to make sure I still finish them, just maybe not as fast as I hoped. Nothing wrong with that.
STEP THREE: Outline the goal and the target audience
This step should be determined during the brainstorming/ideation phase, but it is absolutely important to be officially written in the brief. By doing so, you will not lose sight of it, and it will help you stay on point with your project.
STEP FOUR: Outline the requirements
When I say requirements, I mean tools, resources and skills you’ll need to complete the project. This seems like an odd thing to be in the brief, but in my experience, it’s really important. This is a great way to have all the information about your project in one spot, to ensure you don't run into any technical or skillset challenges along the way. In other words, to make sure you are ready to start the project.
STEP FIVE: Decide on the art direction
This is a BIG ONE. This is what the world will see. So don't rush it, take your time to do the research, brainstorm ideas, think about the essence of your projects, etc. The idea for the art direction can come from different sources. It can be more concrete, like your desire to learn a new skill; or more abstract, like more a philosophical approach to executing the project. Here are some visual parameters to think about; style, colour scheme, common attributes, layout, size, application and possibly a twist. Basically, outline common threads that will connect all the pieces into a coherent project, but also variables that can be different with each piece to make the project more interesting. For example, you can set a colour scheme for the entire project, but each piece can explore a different style. Or, layout and size can be the same for all, but each can have different colours, attributes and styles.
FUN TRICK: Find a few case studies of projects you like (Behance is a good place to do this), and try to imagine what was the art direction. Then look at your project and try to figure out your art direction. Word of caution, don't try to replicate what others have done. Just use this exercise to practice your art direction skills.
STEP SIX: Outline the deliverables
This is the final product. This is what you need to create for your project, and also for the marketing of your project. Sometimes you will need to create a logo for the project, and social media assets to promote it, like reels, carousels, stories etc. You may also want to create blog post assets for the project, an entire website etc. Determine and outline all this in your brief before you start the project.
So that's it for the steps. Writing a brief for personal projects will help you create well-thought-out, professionally presented work, that will draw the attention of your potential clients. You will showcase your skills and build their trust in your ability to deliver high-quality work.